FAQ
Frequently asked Questions
How much will it cost to build a Trillium Dome or Zome?
There are several key factors that will affect the cost of your dome.
Size of Dome
Site Location
Materials Sourcing (recycled materials vs new)
Foundation (existing or new? Wood deck, packed gravel, concrete?)
Intended use (greenhouse, cabin, sauna?)
Types of finish (flooring, special door, insulation)
Materials lists for all plans are written in the product description to help you estimate as well!
Cost per Square Foot for a Trillium Dome or Zome
In general, construction costs are averaged into price per square foot. For example, in the USA, the average cost per sq ft for a residential building is roughly $150. That means a 1000 sq ft house (quite small) will on average cost $150,000, including materials, labor, permitting, etc. but excluding land. There are many places in the country where the cost per sq ft is 2 or 3x that rate. In this regard, if you are hiring the job out completely, domes are not much different than any other type of construction.
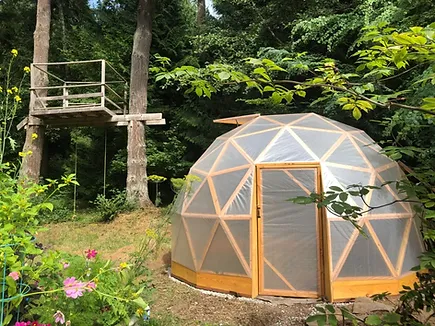
If you are interested in an owner-built geodesic dome, there are some average costs in materials associated with our projects. I have found that with the least expensive cover material and foundation (ex. 9 mil woven poly and a gravel ring), the materials can be less than $5 per sq ft. So a 200 sq ft dome such as this can be $500 in materials!
That price per sq ft can get even cheaper when you build large domes with a strong yet inexpensive cover like 9 mil woven poly or marine pvc)
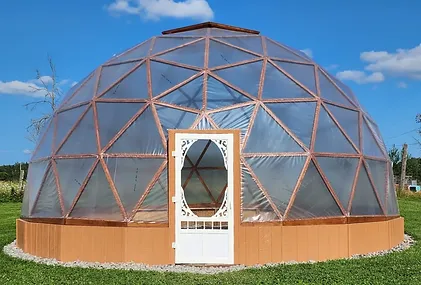
However, the same size footprint covered in solid clear polycarbonate can be $5,000 in materials! We have found that the cost to build a dome or zome greenhouse with high end polycarbonate covers is generally around $25 per sq ft, exclusively due to the cost of the Polycarbonate.
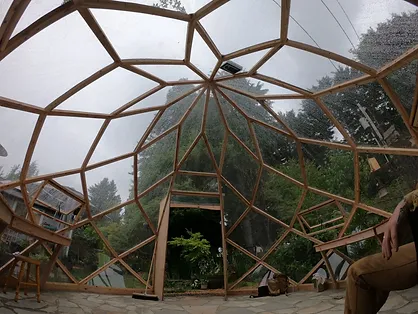
A cabin or sauna style dome build tends to be the same in materials as a high end greenhouse, for the shell only. A dried in dome shell is a structure that has a door, windows and roof. Not yet the finished interior or utilities. These are generally also about $25 per sq ft in materials.

When adding insulation and finishes to domes, the material costs are generally the same if not less than conventional structures because of the efficient surface area of the building as well as easily repeatable components. We have found fully finished dome or zome structures, with insulation, flooring, appliances, ect. Tend to be around $75 per sq ft. Of course, all these costs vary depending on your location, material choices, and design aesthetic.
Each contractor will have their own rates depending on your Trillium Dome project needs. If you are just looking to have a shell built, a safe assumption for a commissioned Trillium Dome is probably $50-$75 per sq ft including labor.
Can Trillium Domes and Zomes handle large snow loads / wind load / extreme temperatures?
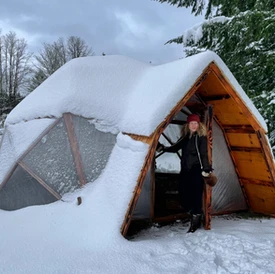
Yes!
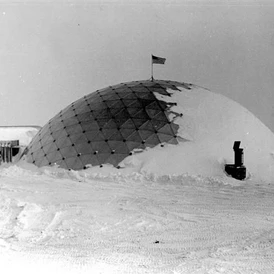
Geodesic Domes are inherently excellent at dealing with high winds and snow loads. They are known to be the lightest and strongest structures ever devised by humans. Domes with poorly designed hubs or flimsy frame materials, such as pvc or plastic, tend to fold or invert at the joints under pressure. Wood framed domes are superior and less expensive in their design, and can usually boast a minimum of 200 pounds per sq ft load rating. Zomes are even more resistant to snow because of the sharp pitch, no snow can build up! In a testament to their strength, the Antarctic Research Station at the south pole was a geodesic dome for decades, even after it had passed its estimated service life. Engineering for our designs can be made available by request!
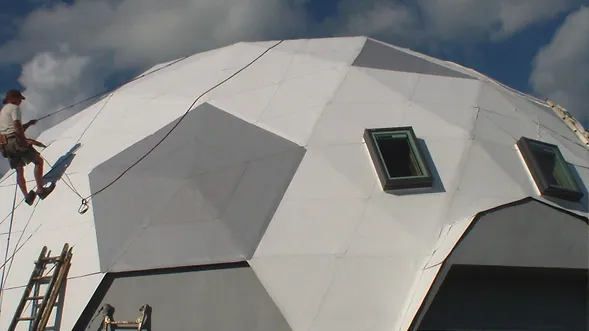
What roofing material should I use for my Trillium Dome or Zome cabin / sauna / community building?
For an insulated dome, there are an incredible amount of options to use for covering your structure. The best one for you depends heavily on your budget and climate. In rainy areas, I would suggest using a rigid panel material such as aluminum composite material (ACM), fiberglass reinforced panel (FRP) or a traditional roof assembly such as plywood, underlayment and roofing material. Roofing materials can be architectural shingles, aluminum shakes, or metal sheet roofing with flashing. In arid climates, you can get away with an elastomeric coating over plywood.
Elastomeric Coating – This material is a good choice for a budget build in an arid climate. I have found that it is not a good long term solution for domes in rainy areas, as the prolonged moisture will eventually degrade the coating. It is an elastic polymer that can be applied to a plywood subroof and covered with an outdoor paint. Multiple coats are encouraged, and maintenance is required often. Unless you live in the desert, I would choose another option.
Asphalt Shingles – A relatively inexpensive and effective solution, asphalt is a good choice for most any dome projects. A solid roofing underlayment and proper flashing is crucial to ensure a long lifetime. Architectural shingles are highly recommended.
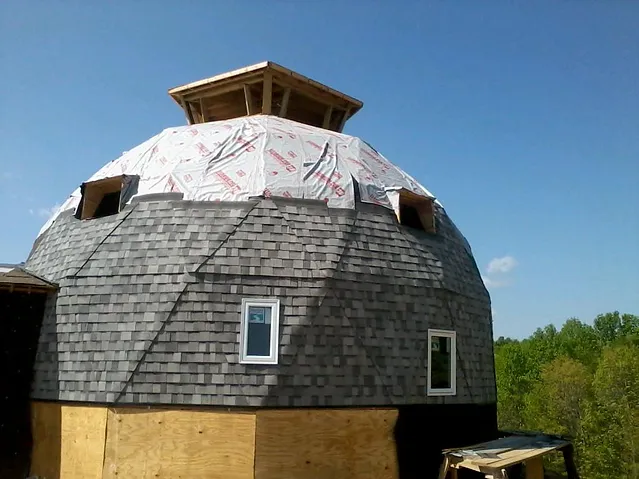
Aluminum Shakes – My personal favorite, aluminum shakes are incredibly well suited for a geodesic dome roof. Coupled with a high quality Ice and Water Shield underlayment, they create an amazingly long lasting roof with top notch weather resistance. They can be formed in many different patterns for domes and zomes and are flexible enough to bend around facet edges.
Thermoplastic Polyolefin – TPO is a single-ply roofing membrane that offers excellent performance at a cost-effective price. Heat-welded seams provide superior strength. TPO’s long-term heat, UV, and natural fungal resistance, plus flexibility without need for plasticizers also make TPO a reliable low-slope roofing system.
Marine Grade Vinyl (PVC) – This material is used in the marine industry for its flexibility, strength, affordability and longevity. It comes in different thicknesses and colors. The thicker versions are a solid middle ground between woven poly films and rigid plastics such as Polycarbonate and Acrylic.
Industrial grade material available
Less expensive than rigid clear material
Highly puncture and Abrasion resistant
Moderately low cost solution
Easily attached to dome frames (see our Ultimate Geodesic Dome Build Guide)
Can be joined with PVC cement for a chemical bond between seams
Can be applied in multiple layers with added air gap
Comes in UV resistant versions, different thicknesses and colors.
Other Materials – Aluminum Composite Material (ACM) and Fiberglass Reinforced Panels (FRP) make good surfaces for dome roofs in many cases as well. They come in sheets of different thicknesses and colors. Additional materials include concrete & sealers, wood shakes, lime plaster, aircrete bricks, and more! Each other these has their own special properties. Their applicability to your project depends mostly on your climate and use of your Trillium Dome.
What materials should I use to cover a Trillium Dome or Zome Greenhouse?
There are many options for many different uses. Look at the properties of these materials versus the cost to make the most informed decision.
For greenhouses, from least expensive to most:
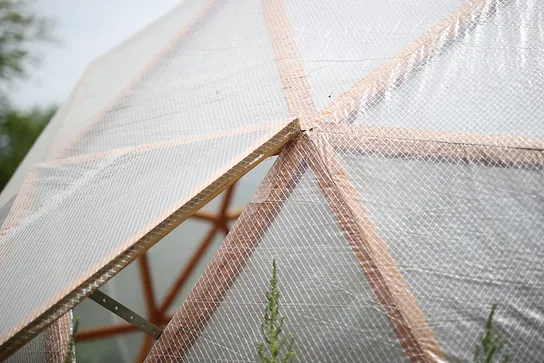
Woven Poly Film – This material comes in many different thicknesses and weaves. It is a woven matt, similar to a tarp, but translucent so plants can thrive. Sometimes they are embedded with strands or fibers as reinforcement.
Used for industrial applications
Outperforms normal box store greenhouse film by a mile
Highly puncture and Abrasion resistant
Very low cost solution
Easily attached to dome frames (see our Ultimate Geodesic Dome Build Guide)
Can be applied in multiple layers with added air gap
Extremely easy to replace a damaged section if need be
Comes in UV and anti condensation versions
Marine Grade Vinyl (PVC) – This material is used in the marine industry for its flexibility, strength, affordability and longevity. It comes in different thicknesses and colors. The thicker versions are a solid middle ground between woven poly films and rigid plastics such as Polycarbonate and Acrylic.
Industrial grade material available
Less expensive than rigid clear material
Highly puncture and Abrasion resistant
Moderately low cost solution
Easily attached to dome frames (see our Ultimate Geodesic Dome Build Guide)
Can be joined with PVC cement for a chemical bond between seams
Can be applied in multiple layers with added air gap
Comes in UV resistant versions, different thicknesses and colors.
Twin Wall Polycarbonate – This material is the gold standard for efficiency and strength when it comes to greenhouses. It is extremely impact resistant and virtually unbreakable. The fluted construction adds insulation and durability. It is one of the more expensive cover materials.
Extremely strong (250x stronger than glass)
Good insulation value
Can be layered for extra insulation
Can be attached with glazing tape, adhesive and roofing screws
Translucent light scattering good for plants and privacy
UV treated, tinted and colored versions available
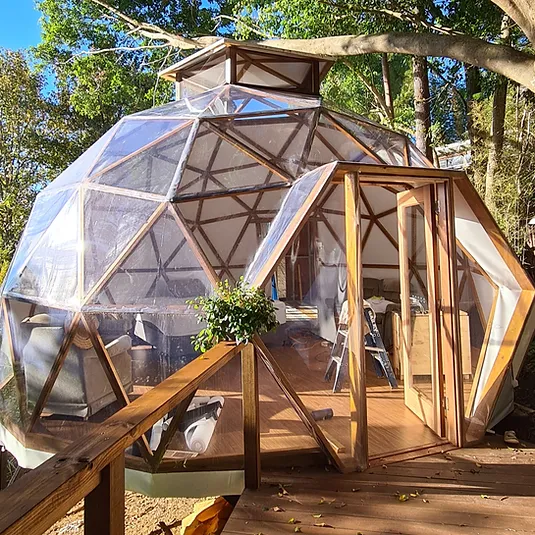
Solid Clear Polycarbonate – This material offers an unparalleled level of transparency, creating an extremely luxurious looking space. It also is a great choice for windows in insulated domes.
Extremely Strong (250x stronger than glass)
Can be layered for extra insulation
Can be attached with glazing tape, adhesive and roofing screws
Crystal clear transparency for excellent views, stargazing, rainy days
UV treated, tinted and colored versions available
What about glass? – I personally don’t use glass, but it is an option. Regular glass is hard to work with, brittle, and quite frankly dangerous. Tempered glass is very expensive because it has to be cut and then tempered, ruling it out for DIY projects. Double glazed type windows would be a good choice for windows in a dome, but the cost is significant. So it is an option, albeit an expensive one.
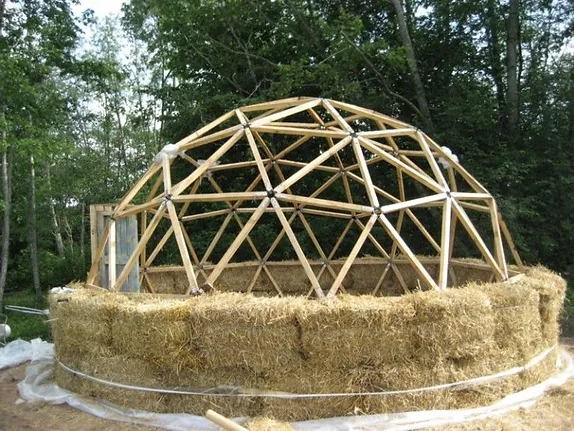
How easy is it to build a Trillium Dome or Zome?
Anyone can do it!
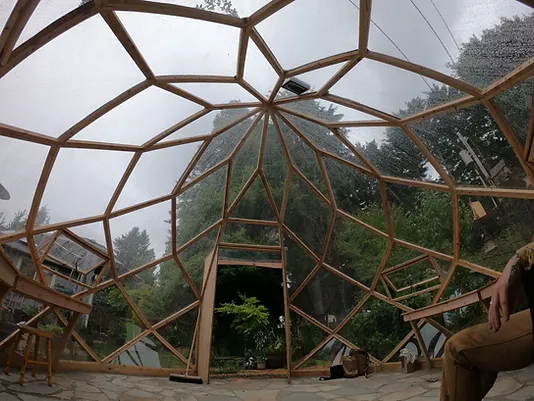
Building a Trillium Dome or Zome is easier than it looks. Many of our customers, from beginners to experienced builders, have completed their domes and zomes with great success using our detailed plans. To help you along the way, we provide step-by-step guidance through our build videos and a full set of instructions. Plus, our gallery page features builds from others who were once in your shoes! With the right mindset and tools, you’ll find it’s a fun and rewarding project. And if you run into any challenges, we’re here to help!
For a better idea of the process, check out our full build videos that we upload to our YouTube channel!
What type of foundation is required for a Trillium Dome or Zome build?
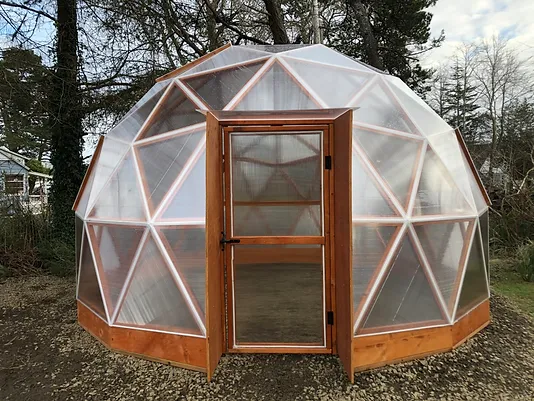
The foundation you choose for your dome or zome depends on the size and purpose of your dome or zome project, as well as local regulations. For a Trillium Domes greenhouse, a packed gravel foundation is often sufficient. This can be as simple as a gravel ring—digging a trench around the dome’s circumference and filling it with gravel to support the pressure-treated base. You can also use a full gravel pad, which can be used as is or serve as a bed for a stone patio.
For more extensive projects, like a dome or zome cabin, consider a wood framed deck, which can accommodate utilities and insulation. If you’re looking for a more robust option, a concrete pad or stem wall is excellent for greenhouses and living spaces, although it requires more expertise.
This is just a quick overview; for more details, check out our in-depth blog post on choosing the right foundation for your dome!
What type of insulation should I choose for my Trillium Dome or Zome?
The foundation you choose for your dome or zome depends on the size and purpose of your dome or zome project, as well as local regulations. For a Trillium Domes greenhouse, a packed gravel foundation is often sufficient. This can be as simple as a gravel ring—digging a trench around the dome’s circumference and filling it with gravel to support the pressure-treated base. You can also use a full gravel pad, which can be used as is or serve as a bed for a stone patio.
For more extensive projects, like a dome or zome cabin, consider a wood framed deck, which can accommodate utilities and insulation. If you’re looking for a more robust option, a concrete pad or stem wall is excellent for greenhouses and living spaces, although it requires more expertise.
This is just a quick overview; for more details, check out our in-depth blog post on choosing the right foundation for your dome!
Do I need a building permit for a Trillium Dome or Zome design?
Great question! Building and zoning regulations vary by county, so it’s essential to check your property’s zoning and the minimum square footage that requires a permit. Some counties even allow larger alternative structures, like greenhouses, to be built without a permit. If you do need a permit, we’re here to help! We can work with you on your specific project to ensure you meet your local building department’s requirements.
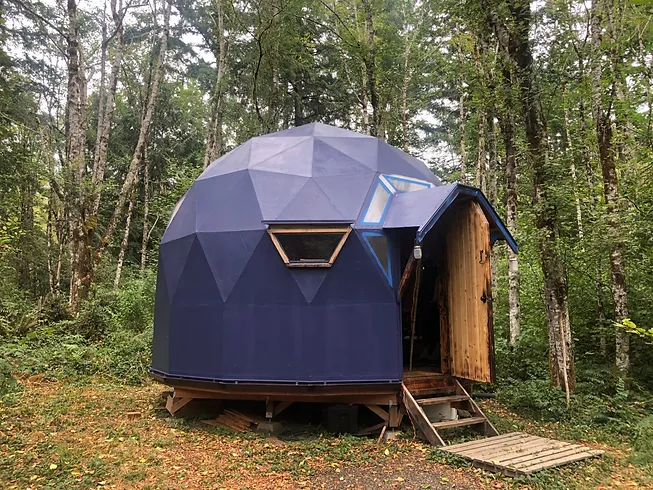
Can Trillium Domes designs be built as a dome or zome cabin or tiny house?
Absolutely! Trillium Dome designs can be fully equipped as homes—insulated, heated, cooled, roofed, plumbed, and powered like any other wood-framed structure. Many factors influence the design of a living space, including climate, location, materials, size, and building codes.
We’re happy to consult with you to address your project’s specific needs, so feel free to contact us! And you can always check out our Gallery Page to see builds for Dome and Zome Cabins, Tiny Houses and Short Term Rentals.
How do you make a dome or a zome waterproof?
Trillium Domes can be easily sealed from rain and weather using various techniques tailored to the design and materials used.
For greenhouse domes with a film cover, frames are covered in sections to minimize seams. A bead of high-quality silicone is applied between the wood frames, and flashing tape adds an extra layer of protection.
For domes with solid panels (polycarbonate or similar), silicone is applied between the frames. Structural sealant is applied to small gaps intentionally made between the solid sheets, creating three layers of protection with optional flashing tape.
Insulated domes can use any conventional roofing material, with a high-quality underlayment being essential.
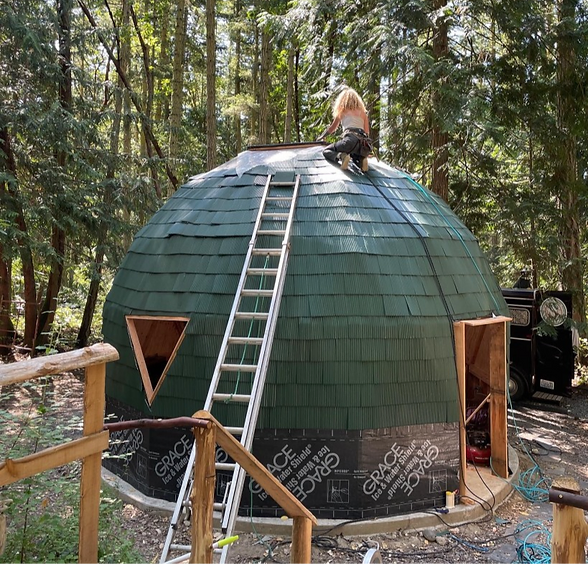
Greenhouse zomes feature aluminum flashing lapped over each panel like shingles, providing an effective and attractive waterproofing method that requires no sealant at all. See our build video for that here:
For more details on waterproofing methods, check out our full build videos on our Youtube Channel!
Where can I find more detailed information?
⦁ Sign up for our email list to get your free Dome and Zome Builders Quick Start Guide PDF! (Bottom of page https://trilliumdomes.com/starthere)
⦁ Our Full FAQ (https://trilliumdomes.com/faq/)
⦁ Our Blog (https://trilliumdomes.com/blog/)
⦁ Our Step-By-Step Video Guides (https://www.youtube.com/@trilliumdomes)
⦁ Looking to start your own business building domes and zomes? We can help! Check out our Trillium Domes Builders Collective and get in touch! (https://docs.google.com/document/d/105zpa5uQ5CVQungiD3odMVwjiguR5Q1nsL7On3DRv0Y/edit?usp=sharing)
⦁ Find the Materials and Equipment you need for your project! (https://trilliumdomes.com/equipmentmaterials/)
⦁ Stay updated day to day through our Instagram! (https://www.instagram.com/trilliumdomes)
⦁ Reach out to us about your project via our Contact Page! (https://trilliumdomes.com/contact/)
Can you fly out / drive out to build me a Trillium Dome or Zome?
We are currently traveling from project to project via a liveaboard sailboat. Check in with where we are, we may be able to come help you with a project as we pass by! If you have the budget to cover travel expenses as well as our rates for site work, reach out! We very well may be willing to travel to you for your project. Our interest will be based on the originality of the project, the location and the budget / rate of pay, in that order! We also have a network of verified builders in our Trillium Domes Builders Collective that we can connect you with! There may be someone near you that can make your dome dreams come true, so don’t hesitate to contact us regarding your project. Many people have also purchased our plans and hired someone local to construct!
What tools will I need to build my own Trillium Dome?
Table saw (not needed for Zomes)
Miter saw (or a hand saw if you’re patient)
Drill (with driver bits)
Straight edge or string line
3 clamps minimum (quick clamps work best, more the merrier)
A few other common tools (Hammer, square, pencil, etc)
How long will it take me to build a Trillium Dome?
This varies widely between each person! If it’s your first time, I would give yourself a few weeks to make the frame. As you get the hang of it, things will progress much faster! For instance, We can now knock out a 15’ diameter frame in two days! Check out our Youtube Channel to get a feel for the process of each project, as they all differ!
How do I seal the panels?
There are essentially 3 levels of sealing you can do. You can do any number of them and in conjunction they provide a great amount of redundancy in your system!
The first is to apply high grade silicone sealant between the frames when assembling the dome panels. For film covered domes, you only need to use sealant between the groups of panels you’ve covered with film.
The second level would be to apply high grade silicone or equivalent between the cover material. This only applies to rigid products like polycarbonate or glass. When cutting the material to size (as shown in my ultimate guide to dome building), leave an ⅛” gap so you can have a space to put your sealant in. This is optional for traditional roofing systems because you will want to apply a membrane over the roof substrate anyway.
The third is a UV resistant flashing tape over the seams of the panels. For many folks building a greenhouse, this may be the only step necessary. However, if you’re absolutely adamant about keeping water out, the more redundancy the better. My suggested tapes are Pro tape 160 or Siga Wigluv Black.